Arduino Uno R3 vs R4: Which One Should You Buy in 2026?
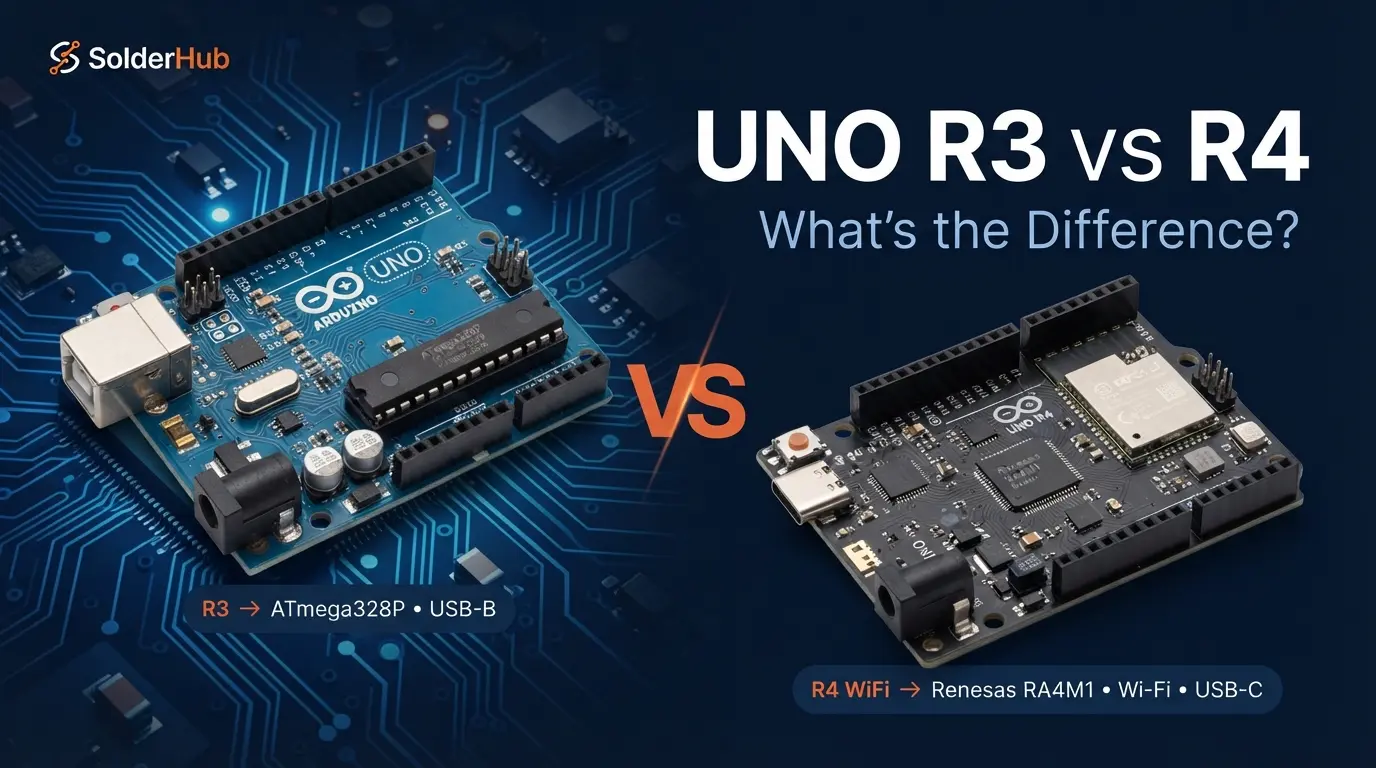
Ask for an "Arduino Uno" today and you can end up with any of three boards. The Uno R3 has been the default since 2011. The Uno R4 arrived in 2023 in two versions, the Minima and the WiFi. All three share one board outline, one set of shield headers, and 5 V logic, so from the outside they look like the same product.
Underneath, they are not. The R3's 8-bit ATmega328P gives way to a 32-bit Arm Cortex-M4, RAM jumps from 2 KB to 32 KB, and the USB-B port with its separate bridge chip is replaced by native USB-C. Most of that is straightforward upside. A few changes only show up when a project that worked on an R3 misbehaves on an R4, and the biggest one is buried in the datasheet: the R4's I/O pins are rated for far less current.
This guide compares the three boards on what actually decides a purchase: processor and memory, analog and USB behavior, power, software compatibility, and cost. If you'd rather skip ahead, the project-by-project section near the end gives a direct recommendation.
The short answer: if you are learning, buy the R3, because nearly every tutorial was written and tested on it. Move to the R4 Minima when a project runs out of RAM or needs true analog output, CAN, or USB keyboard emulation. Buy the R4 WiFi only when you need wireless and want to keep an Uno shield stack. If you need wireless and don't need shields, a bare ESP32 board costs less and does more.
What Stayed the Same
Arduino kept the physical side of the Uno intact on purpose. All three boards have the same outline and header positions, 14 digital pins (D0–D13), 6 analog inputs (A0–A5), PWM on the same six pins (D3, D5, D6, D9, D10, D11), and I2C on A4/A5. A shield that fits an R3 fits an R4.
The logic level stays at 5 V too, which is unusual for a 32-bit board. Most modern microcontroller boards run at 3.3 V, and that is usually the point where 5 V sensors and modules start needing level shifters. On the R4 they don't.
If you already know the R3 layout, you know the R4's. For a pin-by-pin reference, see Arduino Uno R3 Pinout: Every Pin Explained.
What Changed Underneath
%3C/text%3E%3Cline x1='72' y1='382' x2='378' y2='382' stroke='%232b3a4f'/%3E%3Ctext class='c4' x='72' y='408'%3EInput (VIN)%3C/text%3E%3Ctext class='c5' x='378' y='408'%3E7&%238211;12 V%3C/text%3E%3Cline x1='72' y1='422' x2='378' y2='422' stroke='%232b3a4f'/%3E%3Ctext class='c4' x='72' y='448'%3EPin current%3C/text%3E%3Ctext class='c5' x='378' y='448'%3E20 mA%3C/text%3E%3Cline x1='72' y1='462' x2='378' y2='462' stroke='%232b3a4f'/%3E%3Crect x='72' y='488' width='122' height='26' rx='13' fill='none' stroke='%23f2a541' stroke-opacity='0.8'/%3E%3Ctext class='c6' x='133.0' y='506'%3ESocketed chip%3C/text%3E%3Crect x='202' y='488' width='130' height='26' rx='13' fill='none' stroke='%23f2a541' stroke-opacity='0.8'/%3E%3Ctext class='c6' x='267.0' y='506'%3EMost libraries%3C/text%3E%3Crect x='72' y='522' width='115' height='26' rx='13' fill='none' stroke='%23f2a541' stroke-opacity='0.8'/%3E%3Ctext class='c6' x='129.5' y='540'%3ECheap clones%3C/text%3E%3Crect x='423' y='124' width='354' height='440' rx='14' fill='%231a2332' stroke='%232b3a4f'/%3E%3Crect x='423' y='124' width='354' height='8' rx='4' fill='%234aa8ff'/%3E%3Ctext class='c2' x='447' y='176'%3EUno R4 Minima%3C/text%3E%3Ctext class='c3' x='447' y='204'%3ERenesas RA4M1 &%23183; 32-bit Cortex-M4%3C/text%3E%3Ctext class='c4' x='447' y='248'%3EClock%3C/text%3E%3Ctext class='c5' x='753' y='248'%3E48 MHz%3C/text%3E%3Cline x1='447' y1='262' x2='753' y2='262' stroke='%232b3a4f'/%3E%3Ctext class='c4' x='447' y='288'%3EFlash%3C/text%3E%3Ctext class='c5' x='753' y='288'%3E256 KB%3C/text%3E%3Cline x1='447' y1='302' x2='753' y2='302' stroke='%232b3a4f'/%3E%3Ctext class='c4' x='447' y='328'%3ESRAM%3C/text%3E%3Ctext class='c5' x='753' y='328'%3E32 KB%3C/text%3E%3Cline x1='447' y1='342' x2='753' y2='342' stroke='%232b3a4f'/%3E%3Ctext class='c4' x='447' y='368'%3EUSB%3C/text%3E%3Ctext class='c5' x='753' y='368'%3EUSB-C (native)%3C/text%3E%3Cline x1='447' y1='382' x2='753' y2='382' stroke='%232b3a4f'/%3E%3Ctext class='c4' x='447' y='408'%3EInput (VIN)%3C/text%3E%3Ctext class='c5' x='753' y='408'%3E6&%238211;24 V%3C/text%3E%3Cline x1='447' y1='422' x2='753' y2='422' stroke='%232b3a4f'/%3E%3Ctext class='c4' x='447' y='448'%3EPin current%3C/text%3E%3Ctext class='c5' x='753' y='448'%3E8 mA%3C/text%3E%3Cline x1='447' y1='462' x2='753' y2='462' stroke='%232b3a4f'/%3E%3Crect x='447' y='488' width='100' height='26' rx='13' fill='none' stroke='%234aa8ff' stroke-opacity='0.8'/%3E%3Ctext class='c7' x='497.0' y='506'%3E12-bit DAC%3C/text%3E%3Crect x='555' y='488' width='46' height='26' rx='13' fill='none' stroke='%234aa8ff' stroke-opacity='0.8'/%3E%3Ctext class='c7' x='578.0' y='506'%3ERTC%3C/text%3E%3Crect x='609' y='488' width='46' height='26' rx='13' fill='none' stroke='%234aa8ff' stroke-opacity='0.8'/%3E%3Ctext class='c7' x='632.0' y='506'%3ECAN%3C/text%3E%3Crect x='663' y='488' width='69' height='26' rx='13' fill='none' stroke='%234aa8ff' stroke-opacity='0.8'/%3E%3Ctext class='c7' x='697.5' y='506'%3EOp-amp%3C/text%3E%3Crect x='798' y='124' width='354' height='440' rx='14' fill='%231a2332' stroke='%232b3a4f'/%3E%3Crect x='798' y='124' width='354' height='8' rx='4' fill='%2319c3b1'/%3E%3Ctext class='c2' x='822' y='176'%3EUno R4 WiFi%3C/text%3E%3Ctext class='c3' x='822' y='204'%3ERA4M1 + ESP32-S3 module%3C/text%3E%3Ctext class='c4' x='822' y='248'%3EClock%3C/text%3E%3Ctext class='c5' x='1128' y='248'%3E48 MHz%3C/text%3E%3Cline x1='822' y1='262' x2='1128' y2='262' stroke='%232b3a4f'/%3E%3Ctext class='c4' x='822' y='288'%3EFlash%3C/text%3E%3Ctext class='c5' x='1128' y='288'%3E256 KB%3C/text%3E%3Cline x1='822' y1='302' x2='1128' y2='302' stroke='%232b3a4f'/%3E%3Ctext class='c4' x='822' y='328'%3ESRAM%3C/text%3E%3Ctext class='c5' x='1128' y='328'%3E32 KB%3C/text%3E%3Cline x1='822' y1='342' x2='1128' y2='342' stroke='%232b3a4f'/%3E%3Ctext class='c4' x='822' y='368'%3EUSB%3C/text%3E%3Ctext class='c5' x='1128' y='368'%3EUSB-C (native)%3C/text%3E%3Cline x1='822' y1='382' x2='1128' y2='382' stroke='%232b3a4f'/%3E%3Ctext class='c4' x='822' y='408'%3EInput (VIN)%3C/text%3E%3Ctext class='c5' x='1128' y='408'%3E6&%238211;24 V%3C/text%3E%3Cline x1='822' y1='422' x2='1128' y2='422' stroke='%232b3a4f'/%3E%3Ctext class='c4' x='822' y='448'%3EPin current%3C/text%3E%3Ctext class='c5' x='1128' y='448'%3E8 mA%3C/text%3E%3Cline x1='822' y1='462' x2='1128' y2='462' stroke='%232b3a4f'/%3E%3Crect x='822' y='488' width='130' height='26' rx='13' fill='none' stroke='%2319c3b1' stroke-opacity='0.8'/%3E%3Ctext class='c8' x='887.0' y='506'%3EWiFi + BLE 5.0%3C/text%3E%3Crect x='960' y='488' width='138' height='26' rx='13' fill='none' stroke='%2319c3b1' stroke-opacity='0.8'/%3E%3Ctext class='c8' x='1029.0' y='506'%3E12&%23215;8 LED matrix%3C/text%3E%3Crect x='822' y='522' width='62' height='26' rx='13' fill='none' stroke='%2319c3b1' stroke-opacity='0.8'/%3E%3Ctext class='c8' x='853.0' y='540'%3EQwiic%3C/text%3E%3Crect x='48' y='582' width='1104' height='42' rx='10' fill='%231a2332' stroke='%232b3a4f'/%3E%3Ctext class='c9' x='600' y='609'%3EAll three: 5 V logic &%23183; 14 digital + 6 analog pins &%23183; same shield-compatible footprint%3C/text%3E%3Ctext class='c10' x='1152' y='662'%3Esolderhub.com%3C/text%3E%3C/svg%3E)
Processor and Memory
The R3 uses an ATmega328P: 8-bit AVR, 16 MHz, 32 KB of flash, 2 KB of SRAM, 1 KB of EEPROM. Both R4 boards use a Renesas RA4M1, a 32-bit Arm Cortex-M4 running at 48 MHz with a hardware floating-point unit, 256 KB of flash, and 32 KB of SRAM. That is three times the clock speed and sixteen times the RAM.
RAM is the number you will feel first. A 128×64 SSD1306 OLED takes a 1 KB frame buffer, which is half of an R3's memory before your own code allocates anything. Add a few String objects or a JSON library and the sketch starts resetting for no visible reason, one of the harder problems for a beginner to diagnose. On an R4 the same display uses about 3% of the RAM.
Clock speed matters less than the spec sheet suggests. Reading sensors and switching relays never pushes an R3 to its limit. The gap shows up in floating-point math, PID loops, and fast serial or SPI traffic, where the R4 does in hardware what the R3 has to emulate in software.
Analog, PWM and the DAC
Both generations keep the familiar defaults: analogRead() returns 0–1023 and analogWrite() takes 0–255. The R4 lets you go further with analogReadResolution(14) and analogWriteResolution(12). At 14 bits the ADC resolves steps of roughly 0.3 mV across 5 V, against about 4.9 mV on the R3.
The R4 also has something the R3 never did: a real 12-bit DAC on pin A0. Instead of a PWM signal you would have to filter, it outputs an actual analog voltage, which is what audio, waveform generation, and analog control inputs need. Both R4 boards also include an on-chip op-amp.
USB and the Serial Monitor
The R3 puts a second chip behind its USB-B port, an ATmega16U2 on genuine boards or a CH340 on most clones, to act as a USB-to-serial bridge. The R4 boards use USB-C, and the main chip talks USB directly. That has two practical effects.
First, an R4 can present itself as a USB keyboard or mouse using the standard Keyboard and Mouse libraries, with no firmware reflashing. Second, serial behaves differently. Opening the Serial Monitor resets an R3, because the bridge chip pulls the reset line. It does not reset an R4. In exchange, when an R4 resets, its USB port disappears and re-enumerates, so the Serial Monitor may need to reconnect before you see output again.
If an R4 sketch seems to print nothing at startup, that is usually the reason. While debugging, add while (!Serial) {} right after Serial.begin() so the sketch waits for the monitor, and remove it before deploying, since it blocks forever when no computer is attached.
Power
Both generations take power from USB, the barrel jack, or the VIN pin, but they regulate it differently. The R3 uses a linear regulator and recommends 7–12 V. Anything above that is burned off as heat, and an R3 on a 12 V supply with a few hundred milliamps of load runs noticeably warm. The R4 boards use a buck converter and accept 6–24 V, so a 12 V battery pack or a 24 V industrial supply is fine.
The trade-off is switching noise. A buck converter puts more ripple on the 5 V rail than a linear regulator does, which can matter when you're reading low-level analog sensors from a barrel-jack supply. On USB power the difference mostly goes away.
The Catch: Pin Current
On an R3, each I/O pin can source or sink 20 mA comfortably. The ATmega328P datasheet lists 40 mA as the absolute maximum. On an R4, Arduino rates each pin at 8 mA. The code is identical, but wiring that worked on an R3 may not be safe on an R4.
The classic example is an LED with a 220 Ω resistor. On 5 V with a red LED dropping about 2 V, that is roughly 14 mA: fine on an R3, too much for an R4. A 390 Ω resistor brings it to about 8 mA, and 470 Ω leaves some margin. The same rule applies to relay coils, buzzers, and small motors driven straight from a pin. Put a transistor or MOSFET between the pin and the load, which is good practice on an R3 as well.
⚠️ Warning
Wiring copied from an R3 tutorial can overload an R4 pin. Before connecting anything that draws more than a few milliamps directly from a pin, check the resistor value and the load current against the R4's 8 mA rating.
Software Compatibility
Standard Arduino code (pinMode(), digitalWrite(), analogRead(), Serial, Wire, SPI, Servo) compiles for both generations. R3 support ships with the IDE. The R4 needs a one-time install of the Arduino UNO R4 Boards package from the Boards Manager before it appears in the board list, a step older tutorials never mention.
Problems start with anything written specifically for the AVR chip:
- Direct register access such as
DDRB,PORTD, orTCCR1Adoesn't exist on the RA4M1. - AVR headers like
<avr/io.h>or<avr/interrupt.h>fail to compile with a "No such file or directory" error. - Timing-critical libraries written in AVR assembly, older LED-strip and IR-remote libraries in particular, need an R4-aware version.
Most mainstream libraries (Servo, Wire, SPI, and the common display and sensor libraries) support the R4 now. The ones to check are older and more niche. Before buying an R4 for a specific library, open its library.properties file and look at the architectures= line: avr alone means R3 only, while * or renesas_uno means the R4 is covered.
If you want one sketch to run on both, the core defines architecture macros you can branch on. This one reads A0 at each board's best ADC resolution and prints the voltage:
Minima or WiFi?
The two R4 boards share the RA4M1, the memory, and the pinout. The WiFi version adds an ESP32-S3 module (WiFi 4 and Bluetooth LE 5.0), a 12×8 red LED matrix, and a Qwiic connector for plugging in I2C sensors without soldering. It also costs more.
The wireless side runs on the ESP32-S3, not the RA4M1, so the two chips talk over a serial link and the radio adds noticeable current draw when it transmits. On a battery, budget for it.
Skip the WiFi variant if you won't use wireless. The LED matrix and Qwiic port are handy for classroom demos and quick status displays, but they rarely justify the price gap on their own. And if the project needs WiFi but not Uno shields, a bare ESP32 board is cheaper, has far more GPIO, and has a much larger community around wireless code. SolderHub's ESP32 vs Arduino comparison covers where each one makes sense.
Head-to-Head Comparison
Quick Spec Reference
| Feature | Uno R3 | Uno R4 Minima | Uno R4 WiFi |
|---|---|---|---|
| Microcontroller | ATmega328P (8-bit AVR) | Renesas RA4M1 (32-bit Cortex-M4) | RA4M1 + ESP32-S3 module |
| Clock speed | 16 MHz | 48 MHz | 48 MHz |
| Flash | 32 KB | 256 KB | 256 KB |
| SRAM | 2 KB | 32 KB | 32 KB |
| EEPROM | 1 KB | 8 KB (data flash) | 8 KB (data flash) |
| Logic level | 5 V | 5 V | 5 V |
| Current per pin | 20 mA recommended, 40 mA max | 8 mA | 8 mA |
| ADC | 10-bit | 10-bit default, up to 14-bit | 10-bit default, up to 14-bit |
| PWM | 8-bit | 8-bit default, up to 12-bit | 8-bit default, up to 12-bit |
| DAC | None | 12-bit on A0 | 12-bit on A0 |
| Op-amp | No | Yes | Yes |
| RTC | No | Yes | Yes |
| CAN | No | Controller built in | Controller built in |
| Wireless | No | No | WiFi 4 + Bluetooth LE 5.0 |
| LED matrix / Qwiic | No / No | No / No | 12×8 / Yes |
| USB | USB-B via bridge chip | USB-C, native | USB-C, native |
| Input voltage (VIN) | 7–12 V recommended | 6–24 V | 6–24 V |
| Regulator | Linear | Buck | Buck |
| Microcontroller socketed | Yes (DIP) | No | No |
Two rows deserve a second look. Current per pin is the one that changes how you wire things. CAN means the chip has a CAN controller, so you still need an external transceiver module to connect to an actual bus.
Which Board for Which Project
'/%3E%3Cpath d='M310,340 C370,340 370,506 428,506' fill='none' stroke='%2393a4b8' stroke-width='2' marker-end='url(%23ah)'/%3E%3Cpath d='M710,182 C795,182 795,112 878,112' fill='none' stroke='%2393a4b8' stroke-width='2' marker-end='url(%23ah)'/%3E%3Cpath d='M710,182 C795,182 795,242 878,242' fill='none' stroke='%2393a4b8' stroke-width='2' marker-end='url(%23ah)'/%3E%3Cpath d='M710,506 C795,506 795,462 878,462' fill='none' stroke='%2393a4b8' stroke-width='2' marker-end='url(%23ah)'/%3E%3Cpath d='M710,506 C795,506 795,594 878,594' fill='none' stroke='%2393a4b8' stroke-width='2' marker-end='url(%23ah)'/%3E%3Crect x='352' y='248' width='40' height='22' rx='11' fill='%230f1923' stroke='%232b3a4f'/%3E%3Ctext class='c5' x='372' y='264'%3EYes%3C/text%3E%3Crect x='352' y='410' width='40' height='22' rx='11' fill='%230f1923' stroke='%232b3a4f'/%3E%3Ctext class='c5' x='372' y='426'%3ENo%3C/text%3E%3Crect x='792' y='112' width='40' height='22' rx='11' fill='%230f1923' stroke='%232b3a4f'/%3E%3Ctext class='c5' x='812' y='128'%3EYes%3C/text%3E%3Crect x='792' y='218' width='40' height='22' rx='11' fill='%230f1923' stroke='%232b3a4f'/%3E%3Ctext class='c5' x='812' y='234'%3ENo%3C/text%3E%3Crect x='792' y='460' width='40' height='22' rx='11' fill='%230f1923' stroke='%232b3a4f'/%3E%3Ctext class='c5' x='812' y='476'%3EYes%3C/text%3E%3Crect x='792' y='576' width='40' height='22' rx='11' fill='%230f1923' stroke='%232b3a4f'/%3E%3Ctext class='c5' x='812' y='592'%3ENo%3C/text%3E%3Ctext class='c6' x='50' y='640'%3ERule of thumb: if none of the special needs apply, the R3 is still the right board.%3C/text%3E%3Ctext class='c7' x='1150' y='662'%3Esolderhub.com%3C/text%3E%3C/svg%3E)
Choose the Uno R3 when:
- You're new to Arduino. Nearly every tutorial, including SolderHub's Getting Started with Arduino Uno R3 — LED Blink Guide, is written and tested against it.
- The build is a simple sensor node: a DHT22 weather station with a clock, an HC-SR04 distance sensor, a couple of relays.
- You depend on a library or shield that uses AVR registers and has no R4 version.
- You want a socketed chip. The R3's ATmega328P is a DIP package you can pull out and reuse in a circuit of your own. The R4's RA4M1 is soldered on.
- You are driving small loads straight from pins and don't want to redo the current math.
Choose the R4 Minima when:
- A graphic display, JSON parsing, or plenty of strings is pushing an R3 past its 2 KB of RAM.
- The code does real-time floating-point work: PID loops, filtering, sensor fusion.
- You need true analog output (audio, waveforms, control voltages) or a CAN bus connection, with an external transceiver.
- The board should act as a USB keyboard, mouse, or other HID device.
- Power comes from a 12 V or higher supply, where the R3's linear regulator runs hot.
- You want a real-time clock without adding a separate module.
Choose the R4 WiFi when:
- The project needs WiFi or Bluetooth and you want to keep an Uno shield stack.
- You want a built-in status display without wiring up an OLED or LCD.
- You plan to use Qwiic I2C sensors and would rather not solder.
Skip the Uno family when:
- Wireless is the whole point and no shields are involved. Use a bare ESP32 board, and keep the ESP32 pinout guide open while you wire it.
- The project runs out of pins rather than memory. The Mega 2560 is the answer there, and our Mega vs Uno comparison also covers the newer UNO Q for vision and Linux workloads.
Genuine Boards, Clones and Price
The R3 design is open hardware, so clones are everywhere and cost much less than an official board. Most use a CH340 USB chip instead of the ATmega16U2, which means installing a driver on older Windows and macOS releases. Quality varies mostly in the voltage regulator and the USB connector. A clone is fine for a first board or a low-stakes project. For anything that stays powered on, or a shield stack that draws real current, buy from an authorized reseller.
Official pricing has also flipped the old rule of thumb. When the R4 launched, Arduino's own store listed the Minima below the genuine R3, so "the R3 is the cheap option" only holds for clones and bundled kits. Prices move, so check the exact board and seller before deciding.
When buying an R4, make sure the listing names the variant. "Uno R4" alone could mean either board, and the WiFi costs noticeably more.
Common Questions
Will my R3 sketches run on an R4? Most will. Sketches that stick to the Arduino core API compile unchanged. Sketches that use AVR registers or AVR-only libraries need changes.
Do R3 shields work on an R4? Physically and electrically, yes, since the layout and 5 V logic match. Test any shield that draws more than a few milliamps from a pin, and any that depends on AVR-specific timing.
Is the R3 being discontinued? No. Arduino's support pages say it remains available and supported.
Is the R4 Minima worth it if I don't need WiFi? If the project needs the extra RAM, the DAC, CAN, USB HID, or a 12–24 V supply, yes. If not, an R3 does the job.
Can the R4 act as a USB keyboard? Yes. Both R4 boards support the standard Keyboard and Mouse libraries natively. On an R3 that means reflashing the USB chip's firmware.
The Bottom Line
The R3 isn't obsolete, and the R4 isn't an automatic upgrade. They suit different situations.
- Uno R3 for learning the fundamentals, following tutorials, and building simple single-purpose sensor nodes.
- Uno R4 Minima for projects that have outgrown 2 KB of RAM or need a DAC, CAN, USB HID, or a higher-voltage supply.
- Uno R4 WiFi for projects that need wireless inside a shield-compatible Uno.
Most first projects never leave the R3's comfort zone, and paying for headroom you don't use is the mistake to avoid. Match the board to what the project actually demands.
What to Read Next
- Arduino Uno R3 Pinout: Every Pin Explained — the full pin map, power rails, and common wiring mistakes
- Arduino Mega 2560 vs Uno: Which Board Should You Choose? — for projects that need more pins
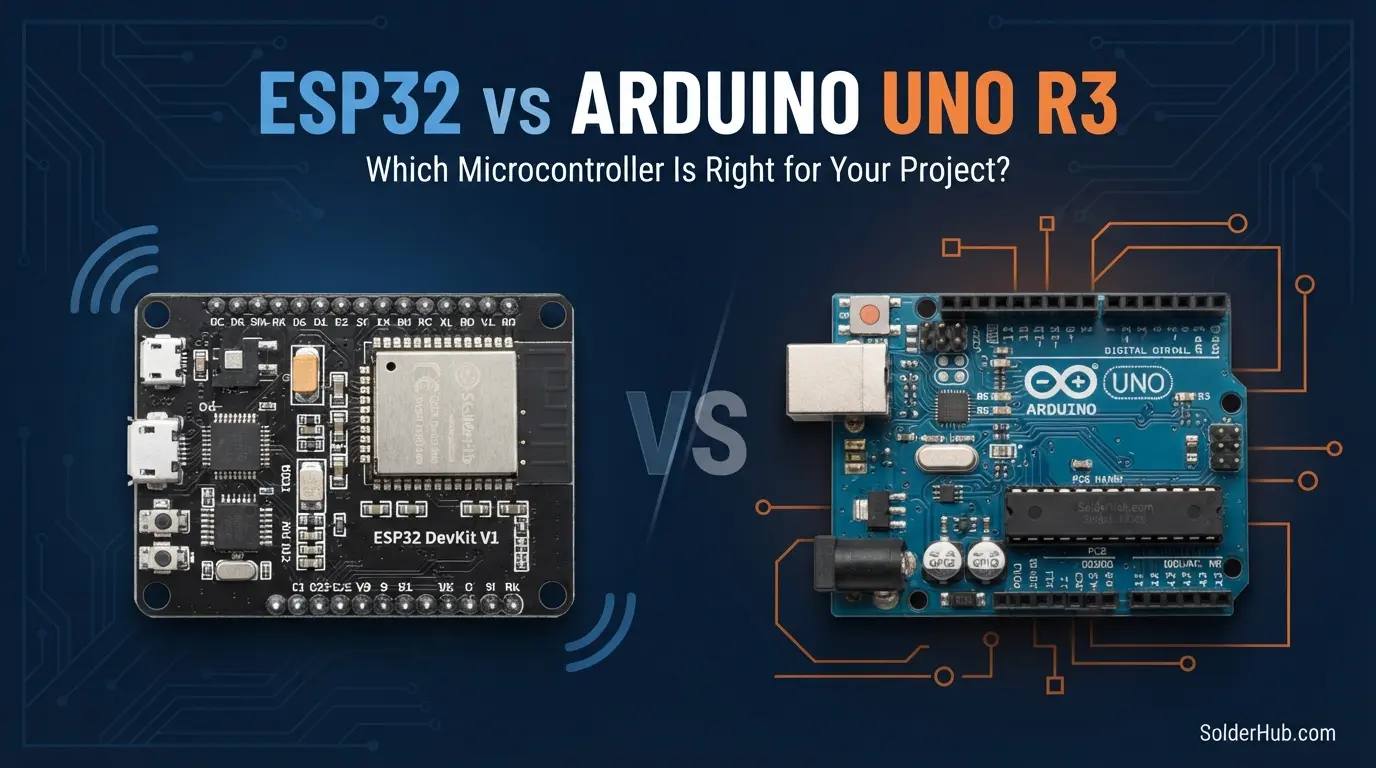
- ESP32 vs Arduino: Which Should You Choose in 2026? — the wireless-first alternative
- I2C vs SPI: What's the Difference and When to Use Each — useful before wiring sensors to any of these boards
SolderHub — Build. Simulate. Learn.