

Motion
Interfacing HC-SR501 Motion with Arduino Uno
What is the HC-SR501?
The HC-SR501 is a passive infrared (PIR) motion-sensor module. Its Fresnel lens focuses infrared changes onto a pyroelectric sensing element; when a warm body moves across the detection area, the module drives OUT HIGH. When the output hold time expires and no new trigger extends it, OUT returns LOW. It provides a digital motion event—not a distance, temperature, or image reading.
This reference covers the common HC-SR501 module, its three pins, trigger modes, adjustable delay and sensitivity, warm-up behavior, and practical design considerations. Module revisions and clone boards can differ, so confirm the labels and behavior of your own board.
Warning
**Power-up warm-up matters.** Allow roughly 30–60 seconds after applying power before judging the sensor. Initial triggers or unstable readings can occur while it settles. Do not use a PIR module as a safety-rated presence detector or the sole protection against hazardous motion.
HC-SR501 specifications
- Sensor type
- Passive infrared (PIR) motion detector
- Supply
- Common module range about 4.5–20 V DC; 5 V is a typical choice
- Output
- Digital active-HIGH; commonly about 3.3 V when HIGH
- Detection range
- Often up to around 5–7 m, depending on module, lens, environment and settings
- Detection angle
- Wide Fresnel-lens field of view; exact angle varies by lens and listing
- Delay adjustment
- Commonly several seconds to a few minutes; exact range varies by module
- Trigger mode
- Jumper-selectable single-trigger (L) or repeatable-trigger (H) on common boards
- Interface
- One digital output; no library or communication bus required
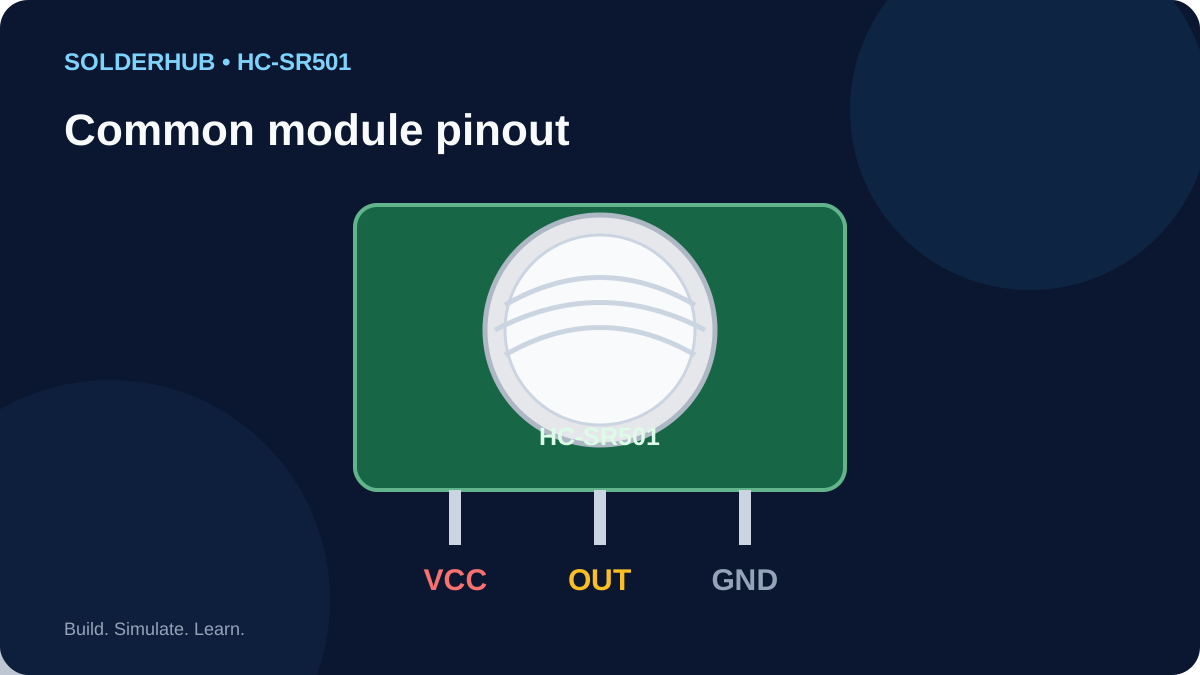
HC-SR501 pinout
| Pin | Connection | Purpose |
|---|---|---|
| VCC | 5 V recommended for beginner circuits | Module power input; check the rating of your revision. |
| OUT | Digital GPIO input | Typically LOW at idle and HIGH when motion is detected/held. |
| GND | Board GND | Common ground reference. |
Swipe sideways to see every column →
How the HC-SR501 works
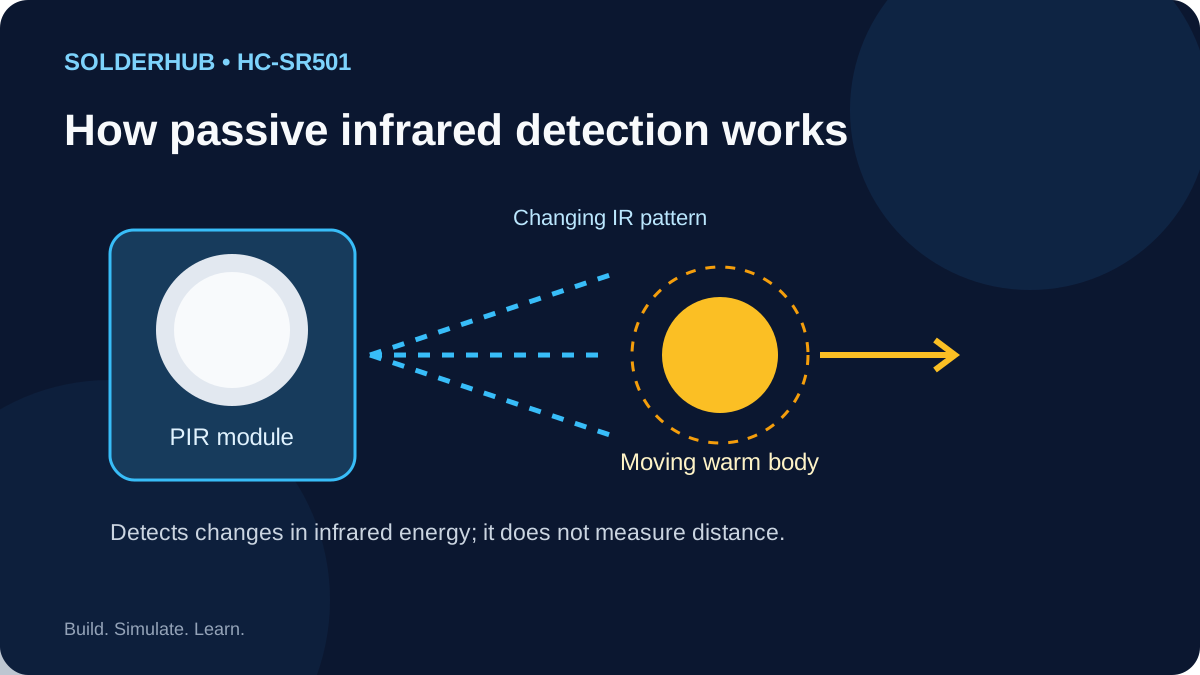
The lens divides the scene into multiple detection zones. As a person moves through those zones, the infrared pattern changes and the module's onboard electronics interpret the change as motion. A stationary person may stop producing repeated triggers even while still in view; PIR sensors are generally more responsive to movement across the field than to movement directly toward the lens.
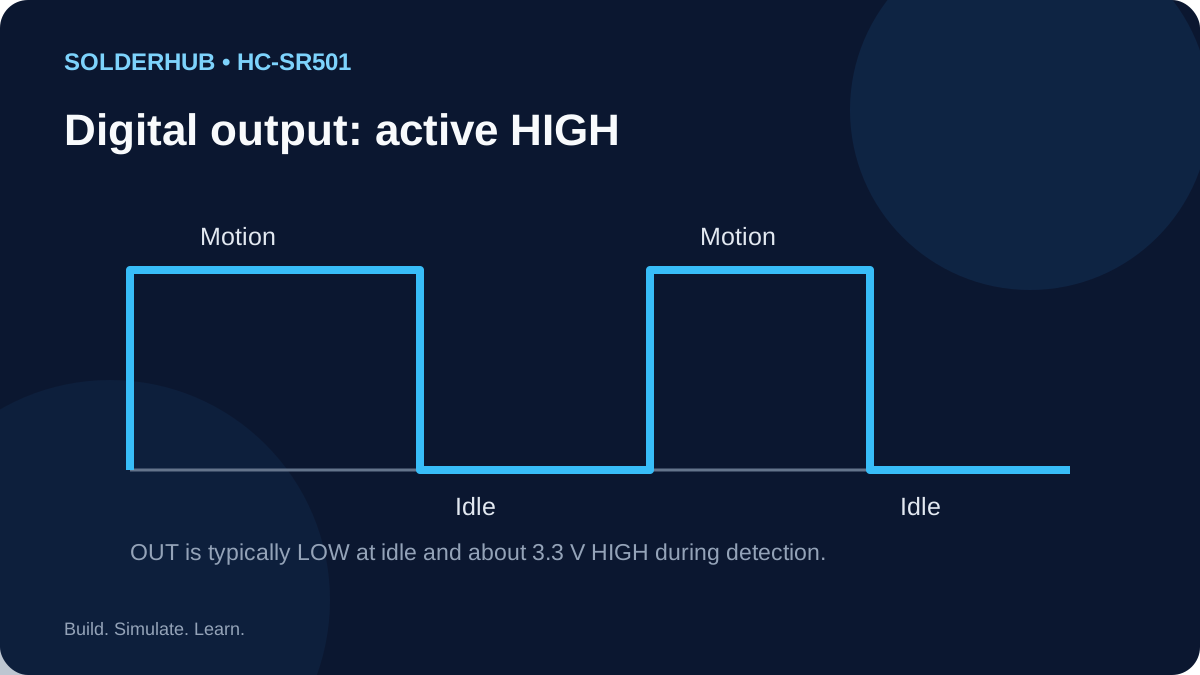
The module's OUT pin is an active-HIGH digital signal. In a typical setup, LOW means idle and HIGH means the output timer is active. The HIGH period depends on the delay trim pot and trigger mode; it is not necessarily the exact time that a person remains in the sensing area.
Sensitivity, delay and trigger mode
- Sensitivity trim pot: adjusts how readily the module detects movement and the practical detection range. Start at a moderate setting and tune it in the installed environment.
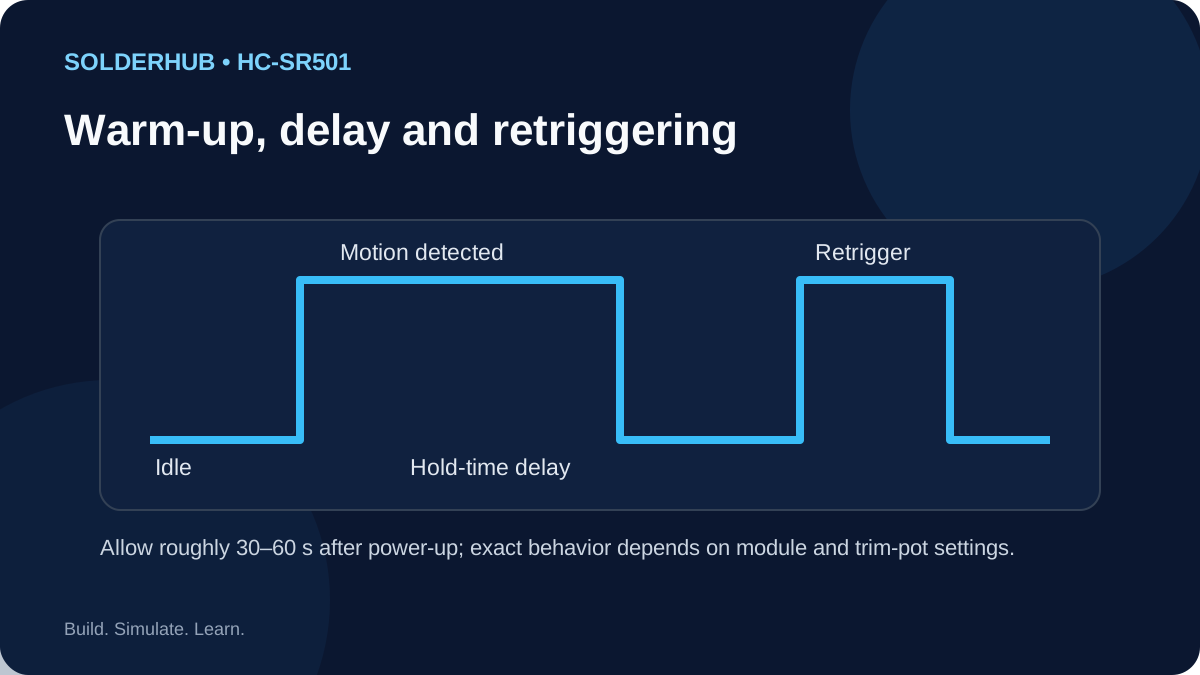
- Time-delay trim pot: controls how long OUT stays HIGH after a trigger. The exact minimum and maximum vary among boards and clones.
- Trigger jumper: common HC-SR501 boards label the modes H and L. In repeatable mode (H), new motion during the HIGH period can retrigger/extend the output. In single-trigger mode (L), additional movement during that period does not keep extending it in the same way. Verify the markings on your board.
- Warm-up: allow about 30–60 seconds after power-up. Avoid adjusting multiple settings at once; change one variable, test, and record the result.
What you can build
- Motion-activated light: use OUT as an input and control a properly rated driver; do not power a lamp or relay coil directly from the sensor output.
- Room occupancy indicator: combine motion events with a timeout in software. A PIR alone cannot guarantee that a room is empty because a motionless person may not trigger it.
- Doorway or corridor alert: use the output to log an event or sound a low-voltage buzzer through an appropriate driver.
- Security prototype: add an alarm indicator or notification system, but treat the HC-SR501 as a hobby sensor, not a tamper-resistant security device.
- Energy-saving automation: use motion to request lighting, then apply a separate software timeout and manual override.
Wiring and installation best practices
- Check the pin labels. Common modules often place VCC, OUT and GND along a three-pin header, but do not rely on a generic image if your board is laid out differently.
- Use a stable supply and common ground. Power the module from a suitable 5 V rail for typical Uno/ESP32 examples and connect GND to the controller's GND.
- Protect the GPIO. The common module output is about 3.3 V HIGH, which is suitable for many 3.3 V inputs, including ESP32. Measure or verify your particular module before connection; never assume an unknown clone has the same output circuit.
- Avoid heat and movement sources. Sunlight, heaters, hot air, moving curtains, and rapid temperature changes can cause false triggers. Mount the sensor firmly and aim the lens at the intended zone.
- Do not expect a rangefinder. The output says motion was detected; it does not identify the person, provide distance, or indicate direction.
- Drive loads correctly. Use a transistor/MOSFET, relay driver, or suitable interface circuit for external loads. Respect the controller's current and voltage limits.
- Handle mains safely. Keep mains wiring physically isolated from low-voltage electronics and use an appropriately enclosed, rated driver. If unsure, use a low-voltage demonstration load.
Troubleshooting
| Symptom | Likely cause | What to check |
|---|---|---|
| OUT stays HIGH for a long time | Delay pot set high, repeatable mode, or repeated motion | Reduce delay carefully, check jumper mode, and test after leaving the field of view. |
| No detection | Incorrect pinout, inadequate supply, lens obstructed, or sensor not settled | Check VCC/GND, allow warm-up, remove obstructions, and walk across the sensing zones. |
| Triggers when nobody is present | Heating/airflow changes, sunlight, vibration, or an overly sensitive setting | Reposition away from HVAC vents and heat sources; lower sensitivity and retest. |
| Detects people inconsistently | Person moves directly toward sensor, poor mounting angle, or range setting too low | Test lateral movement across the lens zones and adjust mounting/sensitivity. |
| ESP32 input reads unpredictably | Missing common ground, long/noisy wires, or output voltage unlike expected | Verify ground and measure OUT HIGH; keep wiring short and confirm GPIO voltage safety. |
| Trigger occurs immediately after power-up | Normal warm-up behavior on some modules | Wait 30–60 seconds before evaluating steady-state operation. |
Frequently asked questions
Does the HC-SR501 need an Arduino library? No. Read OUT with digitalRead(); the module performs its own PIR signal processing.
Is OUT 5 V? The common HC-SR501 output is typically around 3.3 V HIGH, but clones and variants can differ. Verify your module's output before connecting it to a 3.3 V-only GPIO.
Can an ESP32 read the output directly? Usually yes with a standard HC-SR501 module whose OUT is about 3.3 V HIGH. Connect grounds together and verify the actual output voltage. Do not connect an unknown 5 V logic output directly to an ESP32.
Why does it remain HIGH after motion stops? The delay pot sets an output hold time, and repeatable-trigger mode may extend that time if movement continues.
Can it detect a person through glass? Standard PIR sensors generally do not reliably detect body motion through ordinary glass because the relevant infrared wavelengths are blocked or altered.
Does the simulator reproduce real infrared sensing? No. The saved project lets you explore the wiring and code; its motion toggle represents a digital event and does not model optics, temperature, range, or timing.
Continue with a board integration: HC-SR501 with Arduino Uno · HC-SR501 with ESP32 · Explore SolderHub Simulator
Setting Up HC-SR501 with Arduino Uno
Connect the common HC-SR501 module to an Arduino Uno and read its active-HIGH output on D2. The onboard LED follows the input, and the Serial Monitor reports the current state. The module holds OUT HIGH for its configured delay, so it may stay active after movement stops. Allow 30–60 seconds for warm-up.
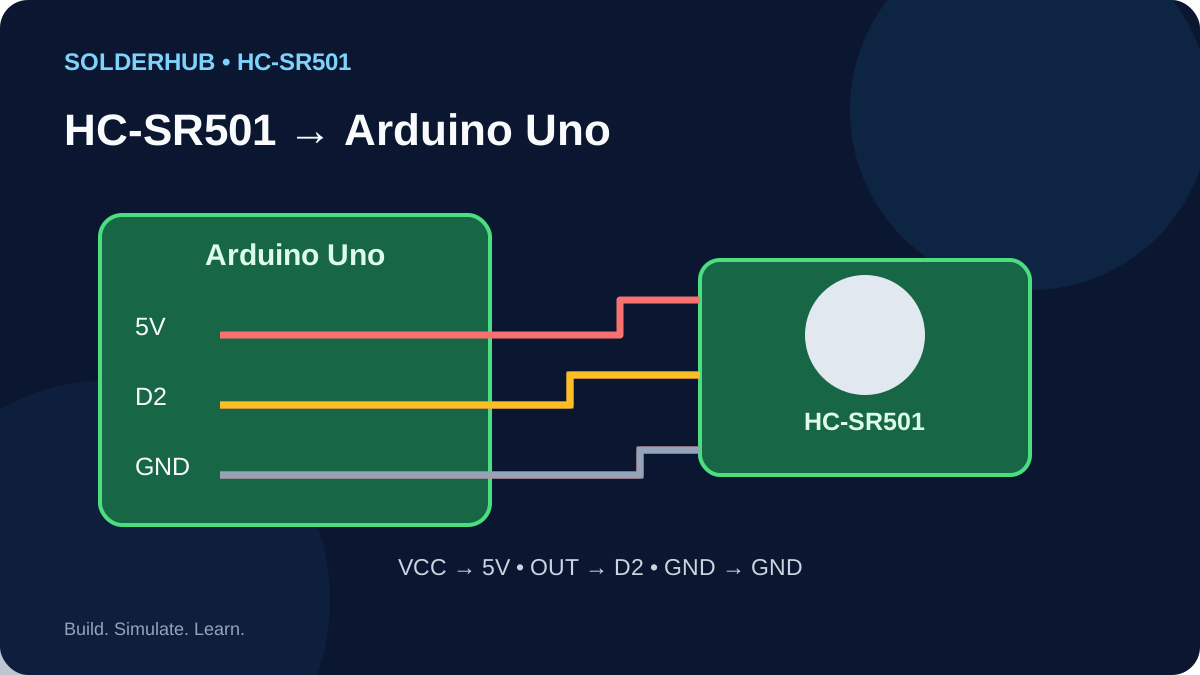
Wiring: HC-SR501 to Arduino Uno
| Sensor pin | Uno pin | Purpose |
|---|---|---|
| VCC | 5V | Powers the module; check its rated supply. |
| OUT | D2 | Digital input; HIGH during the motion hold period. |
| GND | GND | Common ground. |
Swipe sideways to see every column →
Try this circuit — SolderHub Simulator
The circuit is preloaded for exploration. Confirm simulator behavior against the real wiring and sensor datasheet before connecting hardware.
- 1Power down while wiring. Identify VCC, OUT and GND using the labels on your module.
- 2Connect VCC to Uno 5V, OUT to D2, and GND to GND.
- 3Upload the code below to the Uno using Arduino IDE.
- 4Open Serial Monitor at 9600 baud and allow 30–60 seconds for warm-up.
- 5Walk across the sensor's field of view and observe the message and onboard LED.
- 6Leave the area and wait for the configured output hold time to expire.
Expected behavior
The Serial Monitor prints Motion detected while OUT is HIGH and No motion while it is LOW. Repeated messages are normal because the sketch samples every 250 ms; each printed line is not a separate motion event.
Troubleshooting
- OUT seems stuck HIGH: reduce the delay pot, check the H/L jumper and wait for the hold time to expire.
- No detection: check the pin labels, power, warm-up period and mounting angle. Move across the lens zones.
- False triggers: reposition away from heaters, airflow, direct sun and vibration; reduce sensitivity slightly.
- External load: do not power a lamp or relay coil directly from a GPIO. Use a correctly rated driver.
FAQ
Does it need a library? No; the module handles PIR processing and the Uno reads OUT with digitalRead().
Why does the LED stay on? The delay control holds OUT HIGH after a trigger.
Can I use another pin? Yes. Change PIR_PIN and connect OUT to that same digital pin.
Related Components

Related Guides & Projects
Arduino Uno R4 Minima Pinout: Every GPIO, ADC, DAC, and Op-Amp Pin Explained
A complete Arduino Uno R4 Minima pinout reference — digital I/O, ADC, DAC, op-amp, CAN, dual UART, and exactly what it leaves out compared to the WiFi variant.
Mastering PWM on Arduino: Dimming LEDs and Controlling Motors
Understand what PWM actually is on Arduino, dim an LED smoothly, and safely control a DC motor's speed with a driver chip -- plus the mistakes (like wiring a motor straight to a pin) that damage boards.
4-Digit 7-Segment Counter with TM1637 & Arduino
Drive a TM1637-based 4-digit 7-segment display with Arduino Uno to show a real-time up/down counter, elapsed timer, and scrolling text. Covers library setup, brightness control, and custom segment mapping.
Arduino Uno R4 Minima vs WiFi: Which One Should You Choose?
Same processor, same memory, different price. Here's what the WiFi variant's extra hardware actually gets you, and when the Minima is the smarter buy.